
Table of Contents
3Pin vs. 4Pin vs. 5Pin vs. 6Pin Connectors: A Comparison
When it comes to electronic connectors, there are a variety of options available on the market. One common type of connector is the 3-pin, 4-pin, 5-pin, and 6-pin connector. These connectors are used in a wide range of applications, from computer Hardware to automotive electronics. In this article, we will compare the features and uses of these different types of connectors to help you determine which one is best suited for your needs.
Let’s start by looking at the 3-pin connector. This type of connector is commonly used in applications where a simple connection is needed, such as in Power Supplies or LED lighting. The 3-pin connector consists of three Pins that are arranged in a specific configuration to ensure proper alignment and connection. These connectors are typically easy to install and are available in a variety of sizes and configurations to suit different needs.
Next, we have the 4-pin connector. This type of connector is similar to the 3-pin connector but includes an additional pin for added functionality. The 4-pin connector is commonly used in applications where more complex connections are required, such as in computer Motherboards or audio equipment. The extra pin allows for additional features, such as data transfer or power delivery, making the 4-pin connector a versatile option for a wide range of applications.
Moving on to the 5-pin connector, this type of connector is less common but offers even more functionality than the 4-pin connector. The 5-pin connector is often used in applications where multiple signals need to be transmitted, such as in networking equipment or Industrial Machinery. The additional pins in the 5-pin connector allow for more complex connections and can support a wider range of functions, making it a valuable option for more advanced applications.
Finally, we have the 6-pin connector. This type of connector is the most versatile of the four, offering even more pins for increased functionality. The 6-pin connector is commonly used in high-performance applications, such as in gaming PCs or high-end audio equipment. The additional pins in the 6-pin connector allow for even more features and capabilities, making it a popular choice for demanding applications that require a high level of performance.
In conclusion, the choice between a 3-pin, 4-pin, 5-pin, or 6-pin connector will depend on the specific requirements of your application. If you need a simple connection with minimal functionality, a 3-pin connector may be sufficient. For more complex connections and added features, a 4-pin or 5-pin connector may be more suitable. And if you require the highest level of performance and functionality, a 6-pin connector may be the best option for your needs.
Overall, each type of connector has its own unique features and uses, so it’s important to carefully consider your requirements before making a decision. By understanding the differences between these connectors, you can choose the one that best meets your needs and ensures a reliable and efficient connection for your electronic devices.
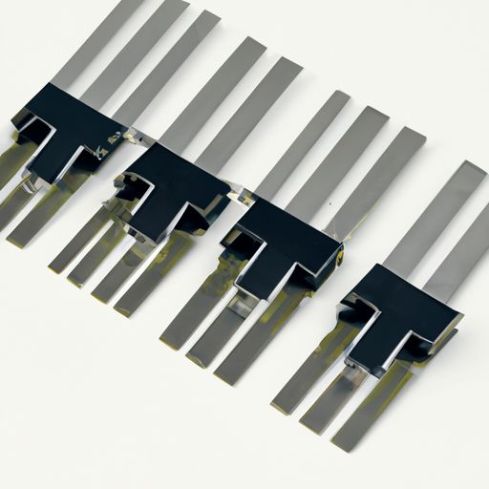
How to Assemble Cables with 7Pin and 8Pin Vertical SMT SRUIS Headers
When it comes to assembling cables with 7Pin and 8Pin vertical SMT SRUIS headers, it is important to have a clear understanding of the components involved and the steps required for a successful assembly process. These headers are commonly used in electronic devices to connect various components and peripherals, and knowing how to properly assemble cables with these headers can help ensure a reliable and secure connection.
 To begin the assembly process, it is important to gather all the necessary components and tools. This includes the 7Pin or 8Pin vertical SMT SRUIS header, the corresponding housing, and the cables that will be connected to the header. Additionally, you will need a soldering Iron, solder, and wire cutters to complete the assembly process.
The first step in assembling cables with 7Pin and 8Pin vertical SMT SRUIS headers is to prepare the header and housing. The header will have a specific number of pins, either 7 or 8, that will need to be aligned with the corresponding slots in the housing. Carefully insert the header into the housing, ensuring that each pin is properly aligned with its corresponding slot.
Once the header is securely in place, the next step is to prepare the cables that will be connected to the header. Strip the insulation from the end of each cable to expose the bare wire. Twist the exposed wires together to ensure a secure connection, and tin the wires with solder to prevent fraying.
With the cables prepared, it is time to solder them to the header. Heat the soldering iron and apply a small amount of solder to the tip. Carefully solder each wire to its corresponding pin on the header, taking care to avoid creating any Shorts or cold joints. Once all the wires are securely soldered in place, trim any excess wire with wire cutters.
After the cables are soldered to the header, it is important to test the connection to ensure that it is secure and reliable. Use a multimeter to check for continuity between each pin on the header and the corresponding wire. If any connections are found to be faulty, re-solder them as needed to ensure a proper connection.
Once the connections have been tested and verified, the final step is to secure the housing around the header. Carefully snap the housing into place, ensuring that it is securely fastened and that the cables are not being pinched or strained. Once the housing is in place, the assembly process is complete, and the cables are ready for use.
In conclusion, assembling cables with 7Pin and 8Pin vertical SMT SRUIS headers requires careful attention to detail and precision. By following the steps outlined above and taking the time to properly prepare and solder the cables, you can ensure a reliable and secure connection that will withstand the rigors of everyday use. With practice and patience, you can become proficient in assembling cables with these headers and confidently tackle any electronic assembly project that comes your way.