
Inhoudsopgave
Top 5 gamingbehuizingen voor computerkasten met synchrone ARGB-lichtstrips
Hoe u ARGB-verlichting in uw pc-chassis installeert en aanpast
Als u wat flair aan uw pc-installatie wilt toevoegen, is het installeren van ARGB-verlichting in uw computerchassis een geweldige manier om dat te doen. Het voegt niet alleen een cool visueel effect toe, maar het kan ook de algehele esthetiek van uw gaminginstallatie helpen verbeteren. In dit artikel bespreken we hoe u ARGB-verlichting in uw pc-chassis kunt installeren en aanpassen, waarbij we ons specifiek richten op de Computer Cabinet Gaming-behuizing met 6 synchrone ARGB Light Strip 192-8 pc-chassis ATX.
Voordat u met het installatieproces begint, is het belangrijk om alle benodigde gereedschappen en componenten te verzamelen. U hebt de ARGB-verlichtingsset, een schroevendraaier en enkele kabelbinders nodig om de bedrading te helpen beheren. Zorg ervoor dat u de instructiehandleiding leest die bij de verlichtingsset wordt geleverd, zodat u zeker bent van een soepel installatieproces.
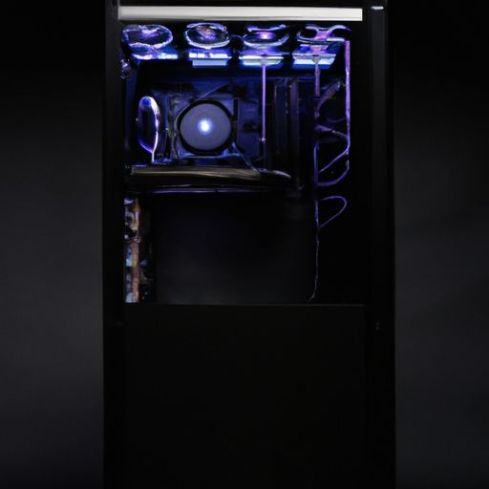
Begin met het openen van uw pc-chassis en zoek het gebied waar u de ARGB-verlichting wilt installeren. In het geval van de Computer Cabinet Gaming-behuizing met 6 Synchrone ARGB Light Strip 192-8 PC-chassis ATX zijn er aangewezen bevestigingspunten voor de lichtstrips. Bevestig de lichtstrips voorzichtig op deze bevestigingspunten met behulp van de meegeleverde schroeven.
Vervolgens sluit u de ARGB-verlichting aan op uw moederbord. Zoek de ARGB-header op uw moederbord en sluit de verlichtingsset hierop aan met behulp van de meegeleverde kabel. Zorg ervoor dat u de juiste richting van de kabel volgt om problemen met de lichteffecten te voorkomen.
Zodra de ARGB-verlichting op uw moederbord is aangesloten, kunt u beginnen met het aanpassen van de lichteffecten. Bij de meeste moederborden wordt Software meegeleverd waarmee je de ARGB-verlichting kunt bedienen. Installeer de software op uw computer en volg de instructies om de lichteffecten in te stellen.
Je kunt kiezen uit verschillende lichteffecten, zoals statische kleuren, ademhalingseffecten en regenboogpatronen. Experimenteer met verschillende effecten om het effect te vinden dat het beste bij uw voorkeuren past. U kunt ook de helderheid en snelheid van de lichteffecten aanpassen om uw pc-chassis verder aan te passen.
Om een nette en georganiseerde installatie te garanderen, gebruikt u kabelbinders om de bedrading van de ARGB-verlichting te beheren. Bevestig de kabels langs de randen van het chassis om te voorkomen dat ze de componenten in de pc hinderen. Dit verbetert niet alleen de esthetiek van uw opstelling, maar helpt ook bij de luchtstroom en koeling.
Als u de ARGB-verlichting in uw pc-chassis hebt geïnstalleerd en aangepast, neem dan even de tijd om uw handwerk te bewonderen. De Computer Cabinet Gaming-behuizing met 6 synchrone ARGB Light Strip 192-8 PC-chassis ATX biedt een verbluffend visueel display dat uw game-ervaring zal verbeteren.
Kortom, het installeren en aanpassen van ARGB-verlichting in uw PC-chassis is een leuk en lonend project dat kan uw gaming-opstelling naar een hoger niveau tillen. Met de juiste tools en componenten kunt u een visueel verbluffend scherm creëren dat indruk zal maken op uw vrienden en medegamers. Experimenteer met verschillende lichteffecten en instellingen om de perfecte combinatie te vinden die bij jouw stijl past. Geniet van de meeslepende ervaring die ARGB-verlichting kan bieden aan uw gaming-installatie.
If you’re looking to add some flair to your PC setup, installing ARGB lighting in your computer chassis is a great way to do so. Not only does it add a cool visual effect, but it can also help improve the overall aesthetics of your gaming rig. In this article, we will discuss how to install and customize ARGB lighting in your PC chassis, specifically focusing on the Computer Cabinet Gaming case with 6 Synchronous ARGB Light Strip 192-8 PC chassis ATX.
Before you begin the installation process, it’s important to gather all the necessary tools and components. You will need the ARGB lighting kit, a Screwdriver, and some Cable Ties to help manage the wiring. Make sure to read the instruction manual that comes with the lighting kit to ensure a smooth installation process.
Start by opening up your PC chassis and locating the area where you want to install the ARGB lighting. In the case of the Computer Cabinet Gaming case with 6 Synchronous ARGB Light Strip 192-8 PC chassis ATX, there are designated mounting points for the light strips. Carefully attach the light strips to these mounting points using the provided Screws.
Next, you will need to connect the ARGB lighting to your motherboard. Locate the ARGB header on your motherboard and connect the lighting kit to it using the provided cable. Make sure to follow the correct orientation of the cable to avoid any issues with the lighting effects.
Once the ARGB lighting is connected to your motherboard, you can start customizing the lighting effects. Most Motherboards come with software that allows you to control the ARGB lighting. Install the software on your computer and follow the instructions to set up the lighting effects.
You can choose from a variety of lighting effects, such as static colors, breathing effects, and rainbow patterns. Experiment with different effects to find the one that best suits your preferences. You can also adjust the brightness and speed of the lighting effects to further customize your PC chassis.
To ensure a clean and organized setup, use cable ties to manage the wiring of the ARGB lighting. Secure the cables along the edges of the chassis to prevent them from interfering with the components inside the PC. This will not only improve the aesthetics of your setup but also help with airflow and cooling.
Once you have installed and customized the ARGB lighting in your PC chassis, take some time to admire your handiwork. The Computer Cabinet Gaming case with 6 Synchronous ARGB Light Strip 192-8 PC chassis ATX offers a stunning visual display that will enhance your gaming experience.
In conclusion, installing and customizing ARGB lighting in your PC chassis is a fun and rewarding project that can take your gaming setup to the next level. With the right tools and components, you can create a visually stunning display that will impress your friends and fellow gamers. Experiment with different lighting effects and settings to find the perfect combination that suits your style. Enjoy the immersive experience that ARGB lighting can bring to your gaming rig.